CI and CD of JAVA War Using Jenkins on a Windows Machine With SonarQube Analysis
Get link
Facebook
X
Pinterest
Email
Other Apps
CI and CD of JAVA War Using Jenkins on a Windows Machine With SonarQube Analysis & Pipeline
Jenkins is an open source automation tool written in Java with plugins built for Continuous Integration purpose. Jenkins is used to build and test your software projects continuously making it easier for developers to integrate changes to the project, and making it easier for users to obtain a fresh build and deploy the generated war file on a remote tomcat server.
Now Lets Start with Downloading Jenkins on local machine
Following steps should be followed so that to install Jenkins successfully:
Step 2) Go to download location from local computer and unzip the downloaded package. Double-click on unzipped jenkins.msi
Step 3) In the setup screen, click Next.
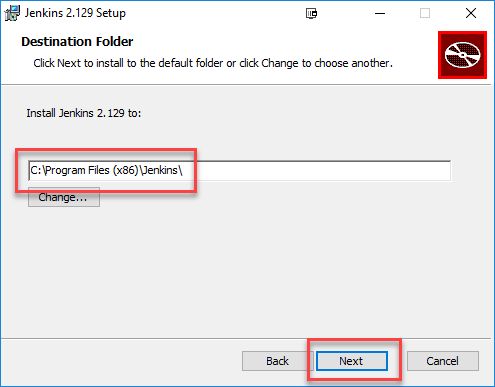
Step 4) Choose the location where you want to have the Jenkins instance installed (default location is C:\Program Files (x86)\Jenkins), then click on Next button.
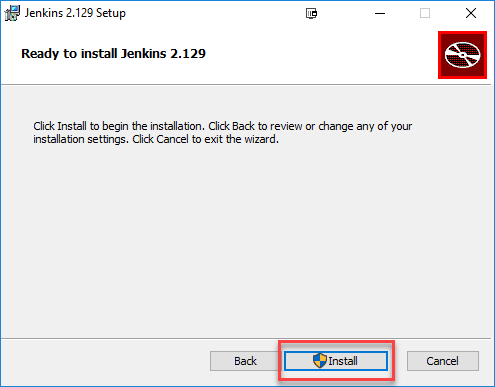
Step 5)Click on the Install button.
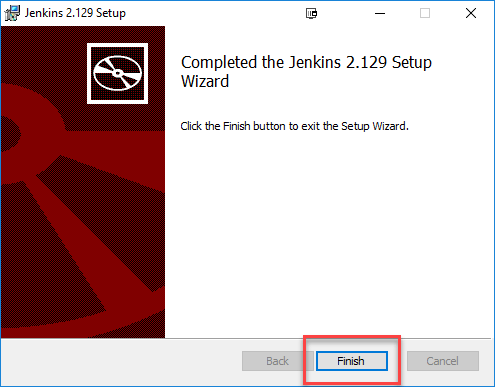
Step 6) Once install is complete, click Finish.
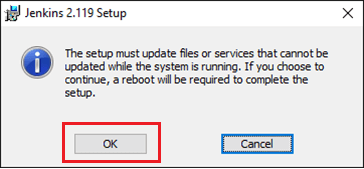
Step 7) During the installation process an info panel may pop-up to inform the user that for a complete setup, the system should be rebooted at the end of the current installation. Click on OK button when the Info panel is popping-up:
How to Unblock Jenkins?
After completing the Jenkins installation phase, you should proceed further and start its configuration. Next steps will guide you how you can unblock Jenkins application:
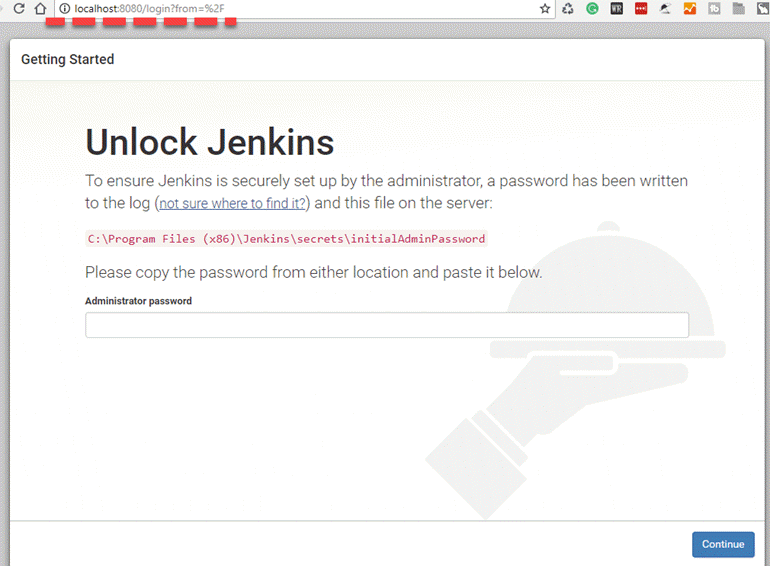
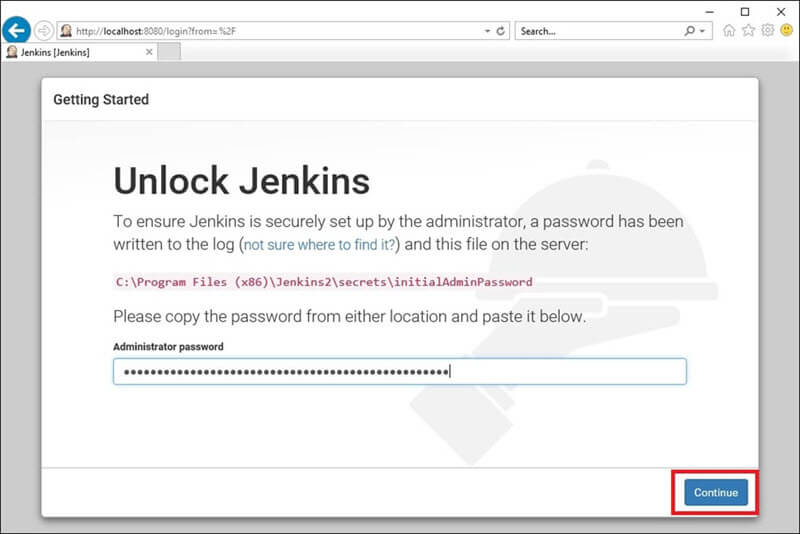
Step 1) After completing the Jenkins installation process, a browser tab will pop-up asking for the initial Administrator password. To access Jenkins, you need to go to browse the following path in your web browser.
http://localhost:8080
If you can access the above URL, then it confirms that Jenkins is successfully installed in your system.
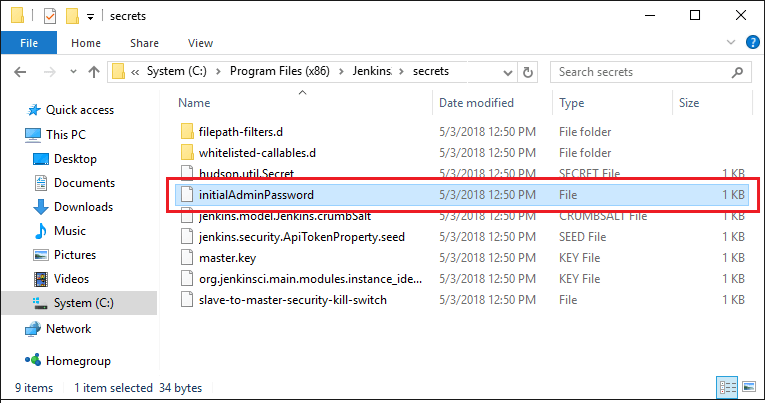
Step 2) The initial Administrator password should be found under the Jenkins installation path (set at Step 4 in Jenkins Installation).
For default installation location to C:\Program Files (x86)\Jenkins, a file called initialAdminPassword can be found under C:\Program Files (x86)\Jenkins\secrets.
However, If a custom path for Jenkins installation was selected, then you should check that location for initialAdminPassword file.
Step 3) Open the highlighted file and copy the content of the initialAdminPassword file.
You can also customize your Jenkins environment by below-given steps:
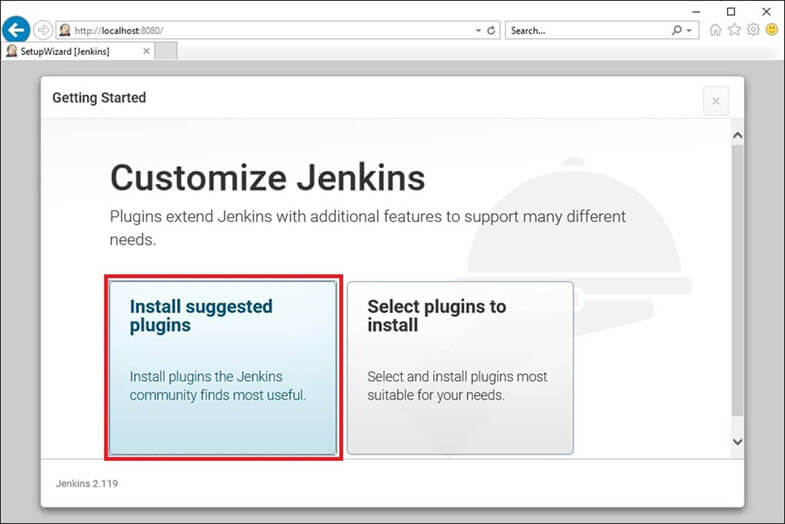
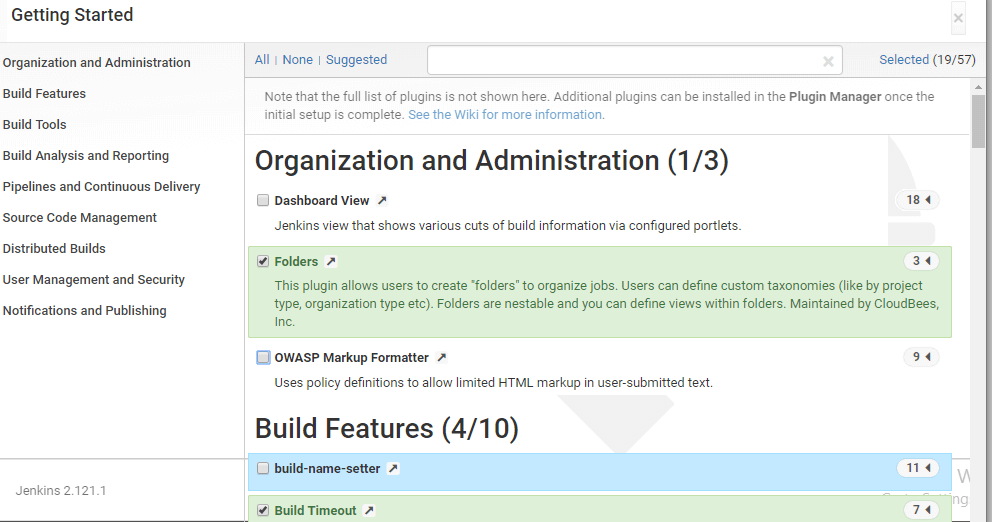
Step 1) Click on the "Install suggested plugins button" so Jenkins will retrieve and install the essential plugins
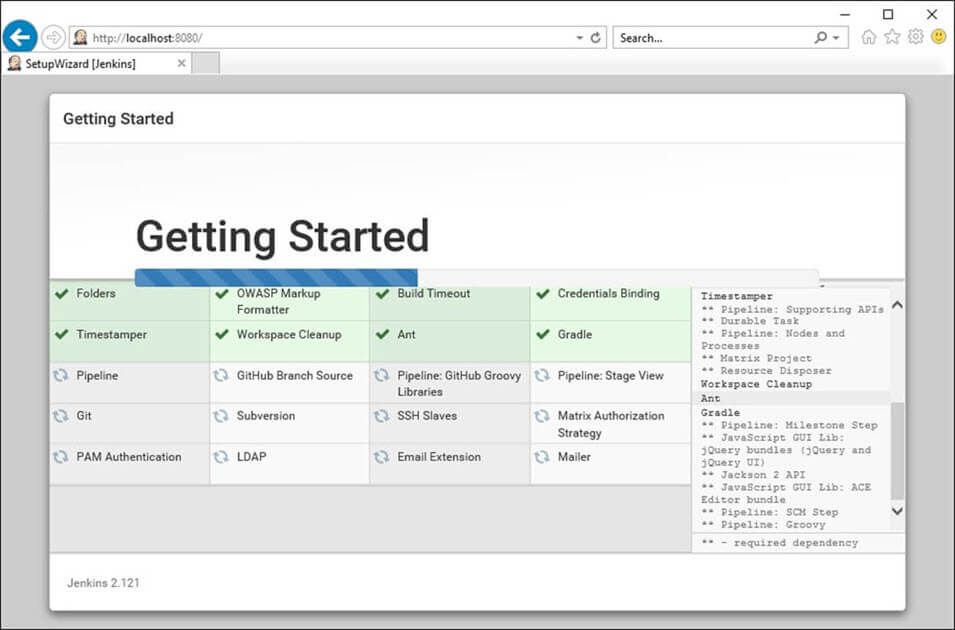
Jenkins will start to download and install all the necessary plugins needed to create new Jenkins Jobs.
Note: You can choose the Option "Select Plugins to Install" and select the plugins you want to install
Step 2) After all suggested plugins were installed, the "Create First Admin User" panel will show up. Fill all the fields with desired account details and hit the "Save and Finish" button.
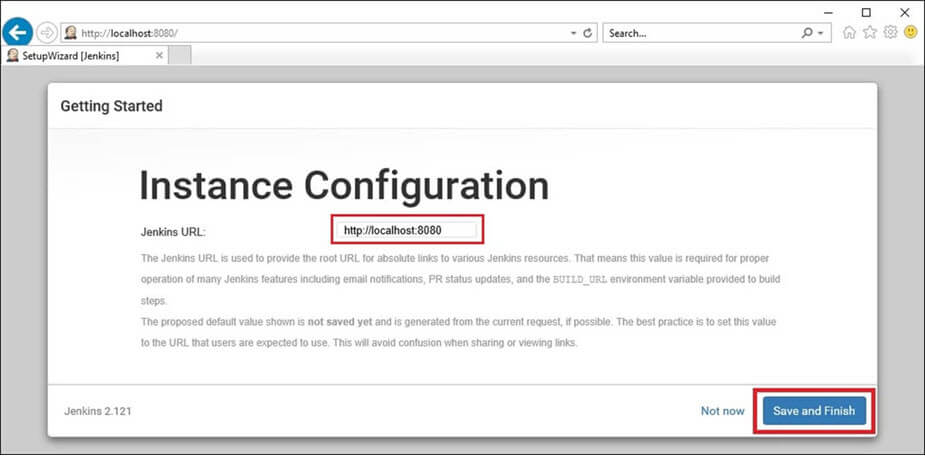
Step 3) Once you have filled the above data, finally it will ask for URL information where you can configure the default instance path for Jenkins. Leave it as it is to avoid any confusions later. However, if another application is already using 8080 port, you can use another port for Jenkins and finally save the settings, and you are done with installation of Jenkins. Hit the "Save and Continue" button:
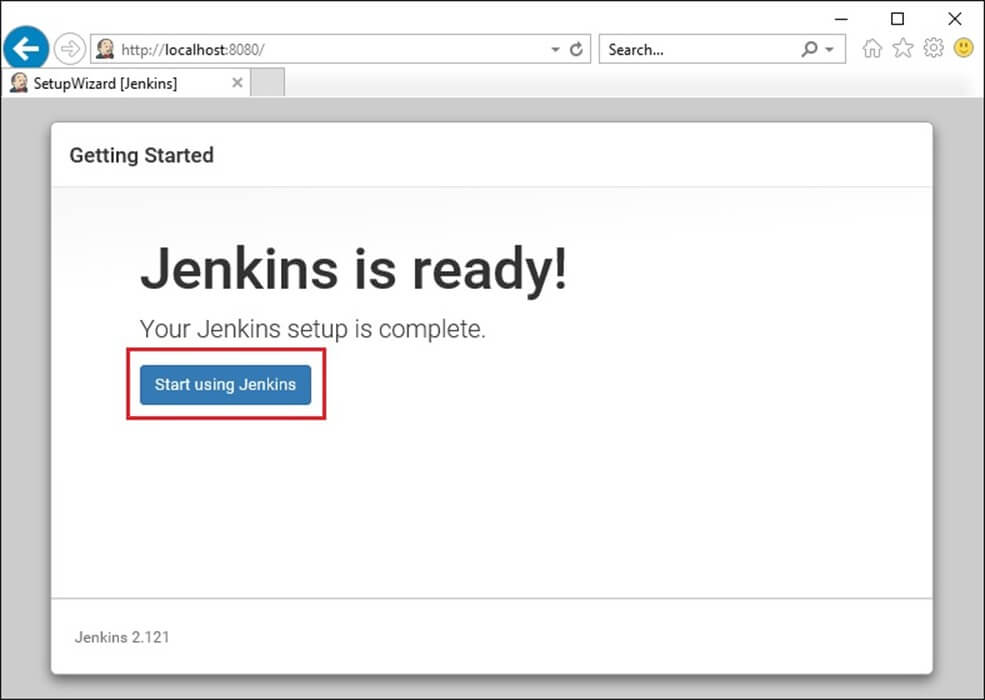
Congratulations! We have successfully installed a new Jenkins Server. Hit the "Start using Jenkins" button.
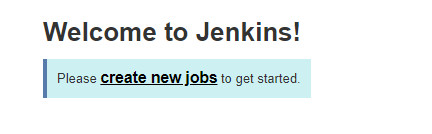
Below you can find the Jenkins instance up and run, ready to create first Jenkins job:
Installation of Plugins in Jenkins
Jenkins comes with a pretty basic setup, so you will need to install the required plugins to enable respective third-party application support.
GitHub is a web-based repository of code which plays a major role in DevOps. It provides a common platform for multiple developers working on the same code/project to upload and retrieve updated code, thereby facilitating continuous integration.
Jenkins needs to have GitHub plugin installed to be able to pull code from the GitHub repository.
You need not install a GitHub plugin if you have already installed the Git plugin in response to the prompt during the Jenkins' installation setup. But if not, here is how you install GitHub plugins in Jenkins and pull code from a GitHub repository.
Install GIT Plugin
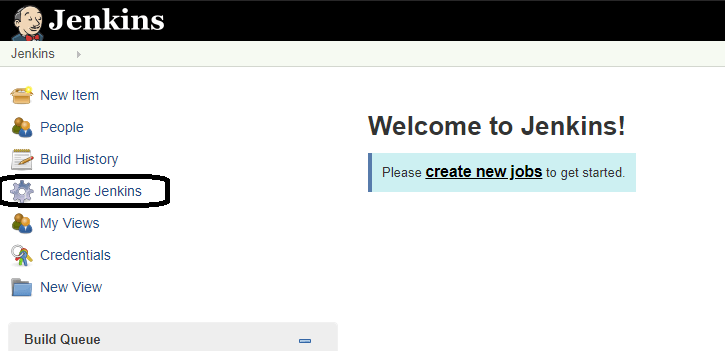
Step 1: Click on the Manage Jenkins button on your Jenkins dashboard:
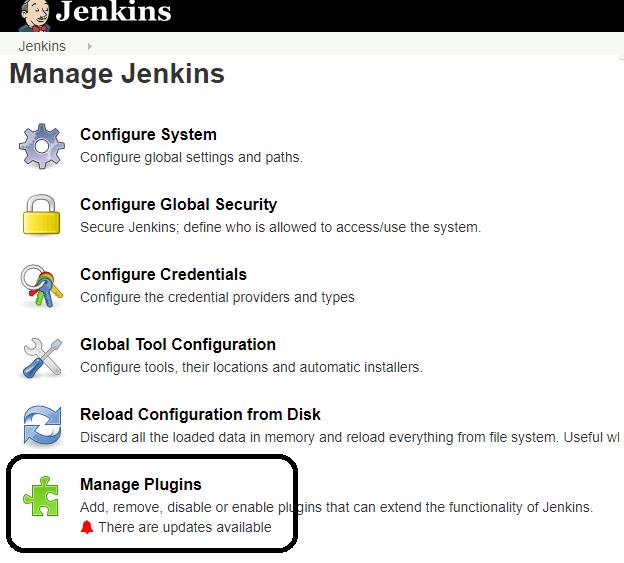
Step 2: Click on Manage Plugins:
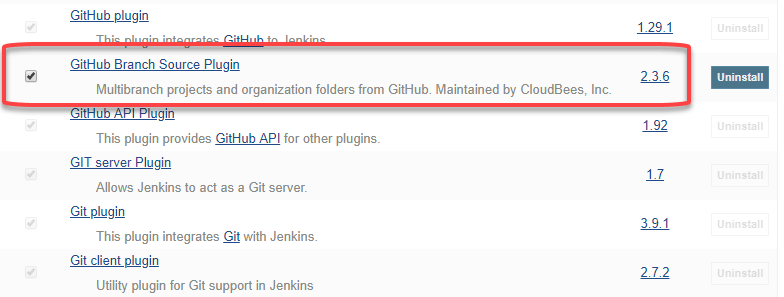
Step 3: In the Plugins Page
Select the GIT Plugin.
Click on Install without restart. The plugin will take a few moments to finish downloading depending on your internet connection, and will be installed automatically.
You can also select the option Download now and Install after restart button. In which plugin is installed after restart
You will be shown a "No updates available" message if you already have the Git plugin installed.
Step 4: Once the plugins have been installed, go to Manage Jenkins on your Jenkins dashboard. You will see your plugins listed among the rest.
Integrating Jenkins with GitHub
We shall now discuss the process of integrating GitHub into Jenkins in a Windows system.
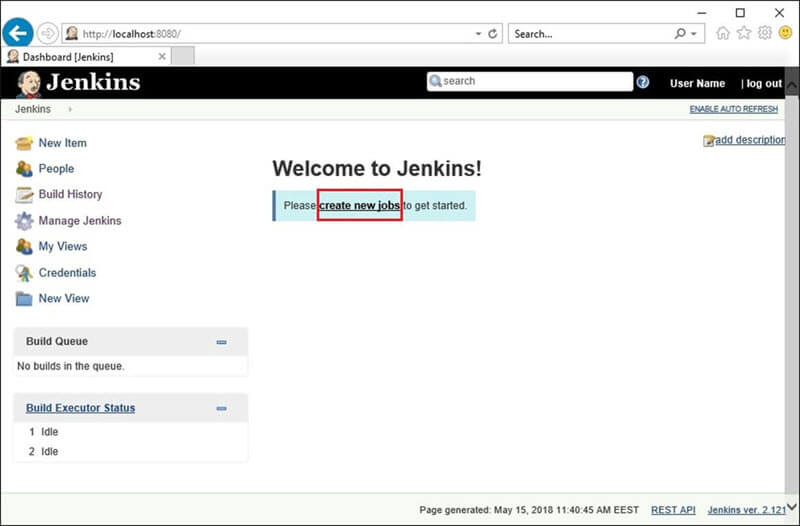
Step 1) Create a new job in Jenkins, open the Jenkins dashboard with your Jenkins URL. For example, http://localhost:8080/
Click on create new jobs:
Step 2) Enter the item name, select job type and click OK. We shall create a Freestyle project as an example.
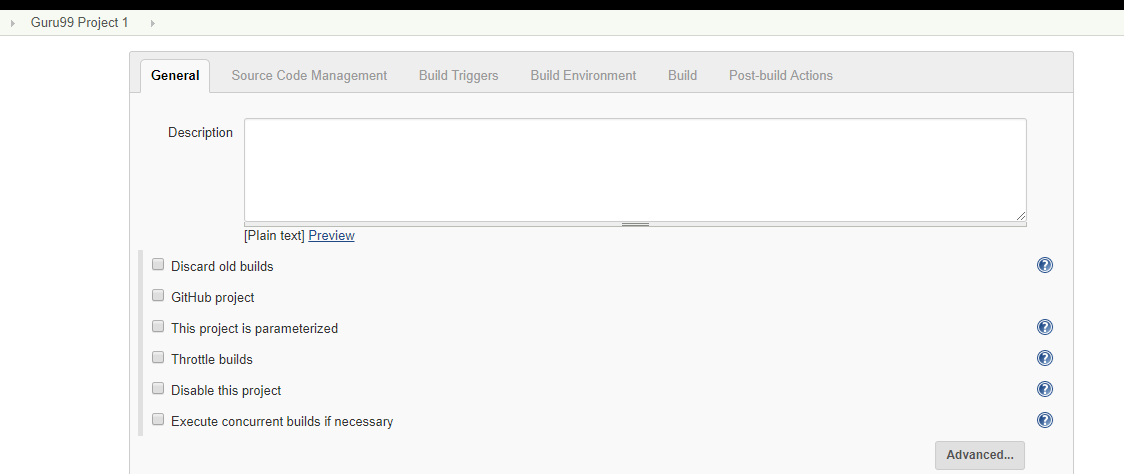
Step 3) Once you click OK, the page will be redirected to its project form. Here you will need to enter the project information:
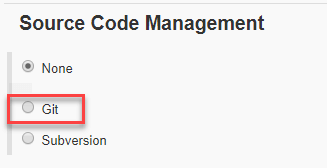
Step 4) You will see a Git option under Source Code Management if your Git plugin has been installed in Jenkins:
NOTE: If the Git option does not appear, try re-installing the plugins, followed by a restart and a re-login into your Jenkins dashboard.You will now be able to see the Git option as mentioned above.
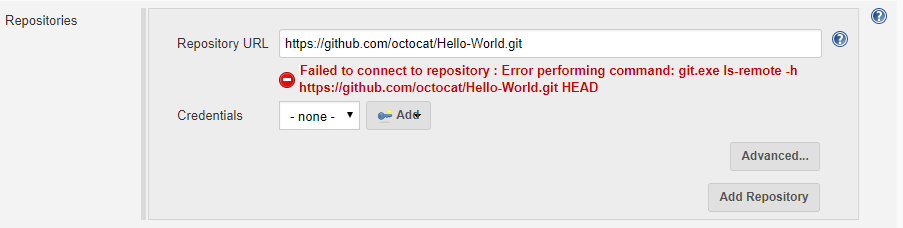
Step 5) Enter the Git repository URL to pull the code from GitHub.
Step 6) You might get an error message the first time you enter the repository URL. For example:
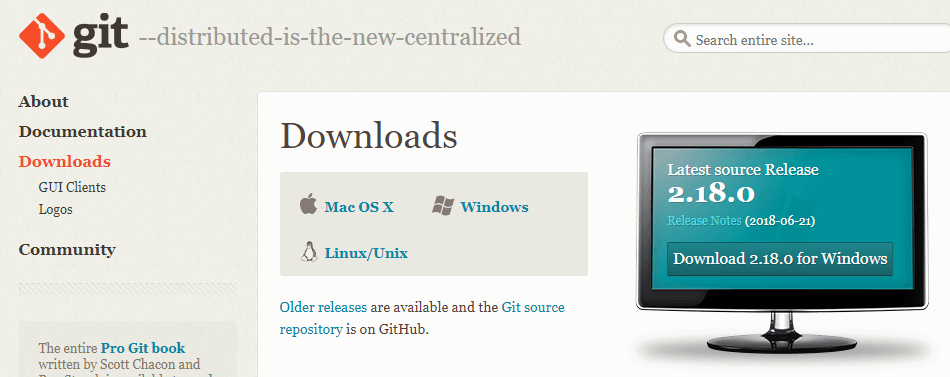
This happens if you do not have Gitinstalled in your local machine. To install Git in your local machine, go to https://git-scm.com/downloads
Download the appropriate Git file for your Operating System, in this case, Windows, and install it onto your local machine running Jenkins. Complete the onscreen instructions to install GIT.
Step 6) You can execute Git repositories in your Jenkins once Git has been installed on your machine. To check ifithas been successfully installed onto your system, open your command prompt, type "Git"and press enter. You should see different options come up for Git:
This means that Git has been installed in your system.
Step 7) Once you have everything in place, try adding the Git URL into Jenkins. You will not see any error messages:
Git is now properly configured on your system.
Maven plug-ins are included in almost all Jenkins releases. You need to have at least one Maven installation.
Configure Maven installation by navigating to Manage Jenkins->Configure System.
In the ‘Maven Installation’ section, click the ‘Add’ button.
Provide a name and choose the version from the drop down, as shown below.
Jenkins will install the given version anytime it’s required.
Add Maven Version and Maven Task in build and click Save
6.Click ‘Build Now’.
7.On the ‘Build Executor Status’, click the progress bar. You will notice Jenkins install Maven.
8.Check your project.The output should look something as shown below.
Deploying the Latest War on Tomcat
Step 1. Install Jenkins plugin
Open your favorite browser and navigate to Jenkins. Log in and select “Manage Jenkins” followed by “Manage Plugins”. Select the “Available” tab, locate the “Deploy to container” plugin and install it.
Step 2. Edit tomcat-users.xml
In order for Tomcat to accept remote deployments, you have to add a user with the role manager-script. To do so, edit the file ../conf/tomcat-users.xml and add the following line:
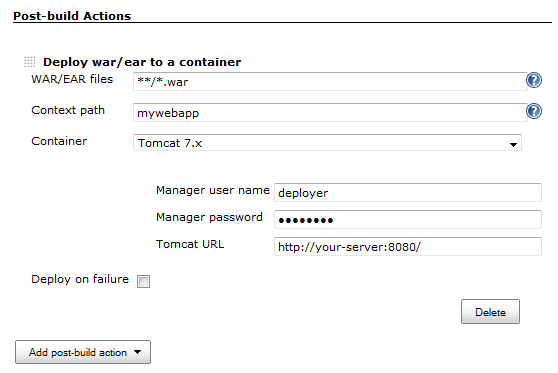
Back in Jenkins, go to your job and select “Configure”. Next, scroll down to the bottom of the page to the “Post-build Actions”. Select the option “Deploy war/ear to a container” from the “Add post-build action” dropdown button. Fill in the new fields, e.g.:
For WAR/EAR files you can use wild cards, e.g. **/*.war. The context path is the context path part of the URL under which your application will be published in Tomcat. Select the appropriate Tomcat version from the Container dropdown box (note that you can also deploy to Glassfish or JBoss using this Jenkins plugin). For the manager’s user name and password just copy over what you’ve entered in the tomcat-users.xml file. The Tomcat URL is the base URL through which your Tomcat instance can be reached. Finally, don’t forget to save the configuration.
Step 4. Run the Job project and verify the end results
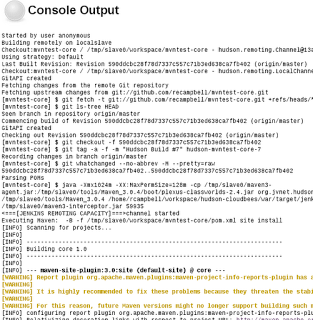
Schedule a build for your job in Jenkins. If you check out the log file you should see one or more lines near the end indicating that the war file has been deployed, e.g.:
If you check the logfiles in Tomcat, you should also see that your application has been succesfully deployed.
Lastly, if you point your browser to the URL and context path you’ve specified in the job configuration in Jenkins (e.g., http://your-server:8080/mywebapp), you should be able to open your freshly deployed application.
Step 2. Extract .zip file and navigate to bin folder
Step 3. Based on your machine configuration go to folder for 32-bit OS move to windows-x86–32 and for 64-bit OS move to windows-x86–64
Step 4. Run StartSonar.bat and after few minute it will start your SonarQube server.
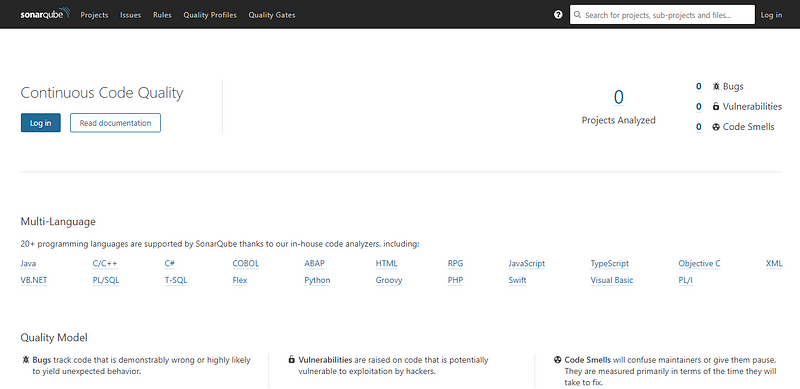
Step 5. Open browser and http://localhost:9000/ (9000 is default) you will be navigated to below window
Note: For any configuration changes go to conf folder and sonar.properties file. Here you can configure database, ldap, webserver, SSO authentication, logging, etc…, e.g. for port — under webserver section I have added sonar.web.port=9005
Step 6. You can login using default user and password (admin : admin)
Running SonarQube From Jenkins
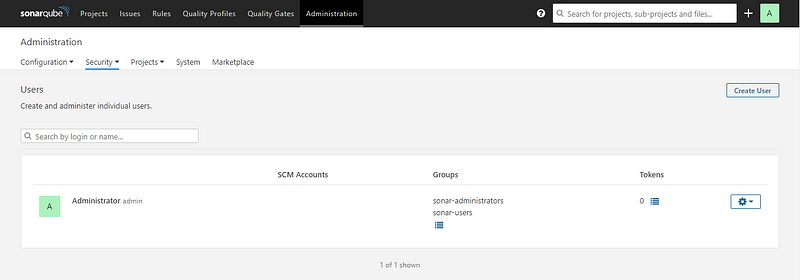
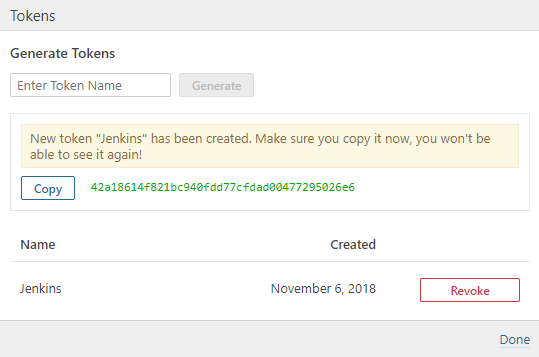
Step 1. Open SonarQube server- Go to Administration > click on Security > Users > Click on Tokens (image 1)> Generate token with some name > Copy the token (image 2), it will be used in Jenkins for Sonar authentication.
Image 1
Step 2. Setup SonarQube with Jenkins- Go to Manage Jenkins > Configure system > SonarQube server section > Add SonarQube > Name it, provide Server URL as http://<IP>:<port> > and authentication token copied from SonarQube Server > Apply and Save
Step 3. Install SonarQube plugin to Jenkins. Go to Manage Jenkins > Manage Plugins > Available > Search for SonarQube Scanner> Install.
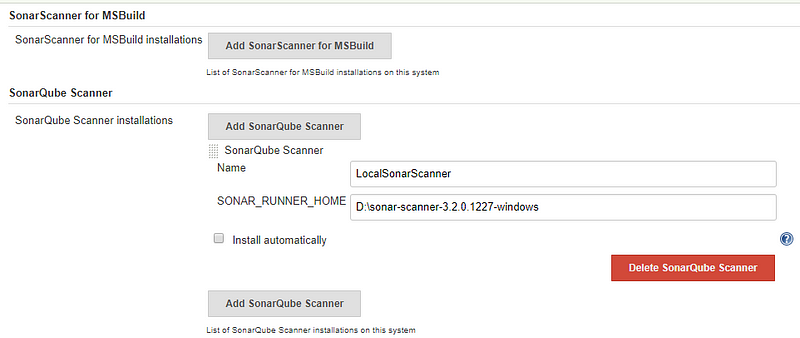
ConfigureSonar ScannerinJenkins : Go toMange Jenkins>Global Tool Configuration> Scroll forSonarQube Scanner>Addsonar scanner > name it, un check if you already have sonar else it will automatically download for you and your sonar scanner setup will be done(in my case I already have) > provide path to sonar runner home as in below images.
Step 4. Create a Job- New Item > Name and select a project type (in my case I am selecting Maven project you can opt for freestyle as well) Step 5. Set Git under SCM section and use * * * * * for Poll SCM under Build Trigger section. Under Build Environment section add pre-buid step > select Execute SonarQube Scanner
Step 6. Create a .properties file at any location and provide path on the task as below(I have created it in Jenkins workspace folder). This property file will be project specific. It contains certain sonar properties like which folder to scan, which folder to exclude in scanning, what is the project key and many more you can see it from https://docs.sonarqube.org/display/SCAN/Analyzing+with+SonarQube+Scanner
To keep it simple I have used only two properties(as above), sonar.projectKey property will create a project inside your SonarQube server with the same name if project don’t exist else it will append analysis to it, sonar.sources defines that which folder to scan. You can provide either relative path from your Jenkins Job workspace or actual path to the folder you want to scan.
Since I have used ./src (use / for windows path ) thatmeans that I am currently on my Job workspace i.e. on SonarQube location and from here I am providing the path to the folder(src) I want to scan.
Step 7.Build the job. After successful build if you can see build logs it will show you the files and folder it has scanned and after scanning it has posted the analysis report to SonarQube Server you have integrated.
Step 8. From job dashboard, click on sonar icon or navigate to Sonar server click on Projects (on header)you will see a new project with same project key you have given in sonar-scanner.properties file. Now you can go inside your project and analyse the report.
Jenkins Pipeline
What is a Jenkins pipeline?
A pipeline is a collection of jobs that brings the software from version control into the hands of the end users by using automation tools. It is a feature used to incorporate continuous delivery in our software development workflow.
Over the years, there have been multiple Jenkins pipeline releases including, Jenkins Build flow, Jenkins Build Pipeline plugin, Jenkins Workflow, etc. What are the key features of these plugins?
They represent multiple Jenkins jobs as one whole workflow in the form of a pipeline.
What do these pipelines do? These pipelines are a collection of Jenkins jobs which trigger each other in a specified sequence.
Let me explain this with an example. Suppose I’m developing a small application on Jenkins and I want to build, test and deploy it. To do this, I will allot 3 jobs to perform each process. So, job 1 would be for build, job 2 would perform tests and job 3 for deployment. I can use the Jenkins build pipeline plugin to perform this task. After creating three jobs and chaining them in a sequence, the build plugin will run these jobs as a pipeline.
This image shows a view of all the 3 jobs that run concurrently in the pipeline.
This approach is effective for deploying small applications. But what happens when there are complex pipelines with several processes (build, test, unit test, integration test, pre-deploy, deploy, monitor) running 100’s of jobs?
The maintenance cost for such a complex pipeline is huge and increases with the number of processes. It also becomes tedious to build and manage such a vast number of jobs. To overcome this issue, a new feature called Jenkins Pipeline Project was introduced.
The key feature of this pipeline is to define the entire deployment flow through code. What does this mean? It means that all the standard jobs defined by Jenkins are manually written as one whole script and they can be stored in a version control system. It basically follows the ‘pipeline as code’ discipline. Instead of building several jobs for each phase, you can now code the entire workflow and put it in a Jenkinsfile. Below is a list of reasons why you should use the Jenkins Pipeline.
Jenkins Pipeline Advantages
It models simple to complex pipelines as code by using Groovy DSL (Domain Specific Language)
The code is stored in a text file called the Jenkinsfile which can be checked into a SCM (Source Code Management)
Improves user interface by incorporating user input within the pipeline
It is durable in terms of unplanned restart of the Jenkins master
It can restart from saved checkpoints
It supports complex pipelines by incorporating conditional loops, fork or join operations and allowing tasks to be performed in parallel
It can integrate with several other plugins
What is a Jenkinsfile?
A Jenkinsfile is a text file that stores the entire workflow as code and it can be checked into a SCM on your local system. How is this advantageous? This enables the developers to access, edit and check the code at all times.
The Jenkinsfile is written using the Groovy DSL and it can be created through a text/groovy editor or through the configuration page on the Jenkins instance. It is written based on two syntax's, namely:
1.Declarative pipeline syntax
2.Scripted pipeline syntax
Declarative pipeline is a relatively new feature that supports the pipeline as code concept. It makes the pipeline code easier to read and write. This code is written in a Jenkinsfile which can be checked into a source control management system such as Git.
Whereas, the scripted pipeline is a traditional way of writing the code. In this pipeline, the Jenkinsfile is written on the Jenkins UI instance. Though both these pipelines are based on the groovy DSL, the scripted pipeline uses stricter groovy based syntax's because it was the first pipeline to be built on the groovy foundation. Since this Groovy script was not typically desirable to all the users, the declarative pipeline was introduced to offer a simpler and more optioned Groovy syntax.
The declarative pipeline is defined within a block labelled ‘pipeline’ whereas the scripted pipeline is defined within a ‘node’. This will be explained below with an example.ion Training
Pipeline concepts
Pipeline
This is a user defined block which contains all the processes such as build, test, deploy, etc. It is a collection of all the stages in a Jenkinsfile. All the stages and steps are defined within this block. It is the key block for a declarative pipeline syntax.
Node
A node is a machine that executes an entire workflow. It is a key part of the scripted pipeline syntax.
There are various mandatory sections which are common to both the declarative and scripted pipelines, such as stages, agent and steps that must be defined within the pipeline. These are explained below:
Agent
An agent is a directive that can run multiple builds with only one instance of Jenkins. This feature helps to distribute the workload to different agents and execute several projects within a single Jenkins instance. It instructs Jenkins to allocate an executor for the builds.
A single agent can be specified for an entire pipeline or specific agents can be allotted to execute each stage within a pipeline. Few of the parameters used with agents are:
Any
Runs the pipeline/ stage on any available agent.
None
This parameter is applied at the root of the pipeline and it indicates that there is no global agent for the entire pipeline and each stage must specify its own agent.
Label
Executes the pipeline/stage on the labelled agent.
Docker
This parameter uses docker container as an execution environment for the pipeline or a specific stage. In the below example I’m using docker to pull an image. This image can now be used as an execution environment to run multiple commands.
Stages
This block contains all the work that needs to be carried out. The work is specified in the form of stages. There can be more than one stage within this directive. Each stage performs a specific task. In the following example, I’ve created multiple stages, each performing a specific task.
Steps
A series of steps can be defined within a stage block. These steps are carried out in sequence to execute a stage. There must be at least one step within a steps directive. In the following example I’ve implemented an echo command within the build stage. This command is executed as a part of the ‘Build’ stage.
Now that you are familiar with the basic pipeline concepts let’s start of with the Jenkins pipeline tutorial. Firstly, let’s learn how to create a Jenkins pipeline.
Creating your first Jenkins pipeline.
Step 1: Log into Jenkins and select ‘New item’ from the dashboard.
Step 2: Next, enter a name for your pipeline and select ‘pipeline’ project. Click on ‘OK’ to proceed.
Step 3: Scroll down to the pipeline and choose if you want a declarative pipeline or a scripted one.
Step 4: If you want a scripted pipeline then choose ‘pipeline script’ and start typing your code.
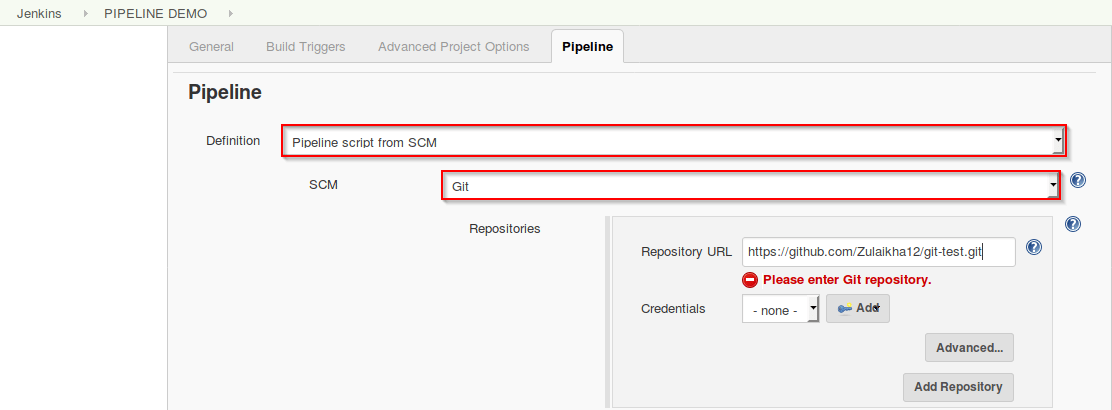
Step 5: If you want a declarative pipeline then select ‘pipeline script from SCM’ and choose your SCM. In my case I’m going to use Git throughout this demo. Enter your repository URL.
Step 6: Within the script path is the name of the Jenkinsfile that is going to be accessed from your SCM to run. Finally click on ‘apply’ and ‘save’. You have successfully created your first Jenkins pipeline.
Script path – Jenkins Pipeline Tutorial
Now that you know how to create a pipeline, lets get started with the demo.
Declarative Pipeline Demo
The first part of the demo shows the working of a declarative pipeline. Refer the above ‘Creating your first Jenkins pipeline’ to start. Let me start the demo by explaining the code I’ve written in my Jenkinsfile.
Since this is a declarative pipeline, I’m writing the code locally in a file named ‘Jenkinsfile’ and then pushing this file into my global git repository. While executing the ‘Declarative pipeline’ demo, this file will be accessed from my git repository. The following is a simple demonstration of building a pipeline to run multiple stages, each performing a specific task.
The declarative pipeline is defined by writing the code within a pipeline block. Within the block I’ve defined an agent with the tag ‘any’. This means that the pipeline is run on any available executor.
Next, I’ve created four stages, each performing a simple task.
Stage one executes a simple echo command which is specified within the ‘steps’ block.
Stage two executes an input directive. This directive allows to prompt a user input in a stage. It displays a message and waits for the user input. If the input is approved, then the stage will trigger further deployments.
In this demo a simple input message ‘Do you want to proceed?’ is displayed. On receiving the user input the pipeline either proceeds with the execution or aborts.
Stage three runs a ‘when’ directive with a ‘not’ tag. This directive allows you to execute a step depending on the conditions defined within the ‘when’ loop. If the conditions are met, the corresponding stage will be executed. It must be defined at a stage level.
In this demo, I’m using a ‘not’ tag. This tag executes a stage when the nested condition is false. Hence when the ‘branch is master’ holds false, the echo command in the following step is executed.
pipeline {
agent any
stages {
stage('One') {
steps {
echo 'Hi, This is sample'
}
}
stage('Two') {
steps {
input('Do you want to proceed?')
}
}
stage('Three') {
when {
not {
branch "master"
}
}
steps {
echo "Hello"
}
}
stage('Four') {
parallel {
stage('Unit Test') {
steps {
echo "Running the unit test
}
}
stage('Integration test') {
agent {
docker {
reuseNode true
image 'centOS'
}
}
steps {
echo "Running the integration test..."
}
}
}
}
}
}
Stage four runs a parallel directive. This directive allows you to run nested stages in parallel. Here, I’m running two nested stages in parallel, namely, ‘Unit test’ and ‘Integration test’. Within the integration test stage, I’m defining a stage specific docker agent. This docker agent will execute the ‘Integration test’ stage.
Within the stage are two commands. The reuseNode is a Boolean and on returning true, the docker container would run on the agent specified at the top-level of the pipeline, in this case the agent specified at the top-level is ‘any’ which means that the container would be executed on any available node. By default this Boolean returns false.
There are some restrictions while using the parallel directive:
A stage can either have a parallel or steps block, but not both
Within a parallel directive you cannot nest another parallel directive
If a stage has a parallel directive then you cannot define ‘agent’ or ‘tool’ directives
Now that I’ve explained the code, lets run the pipeline. The following screenshot is the result of the pipeline. In the below image, the pipeline waits for the user input and on clicking ‘proceed’, the execution resumes.
Scripted Pipeline Demo
To give you a basic understanding of the scripted pipeline, lets execute a simple code. Refer to Creating your first Jenkins pipeline to create the scripted pipeline. I will run the following script.
In the above code I have defined a ‘node’ block within which I’m running the following:
The conditional ‘for’ loop. This for loop is for creating 2 stages namely, Stage #0 and Stage #1. Once the stages are created they print the ‘hello world!’ message
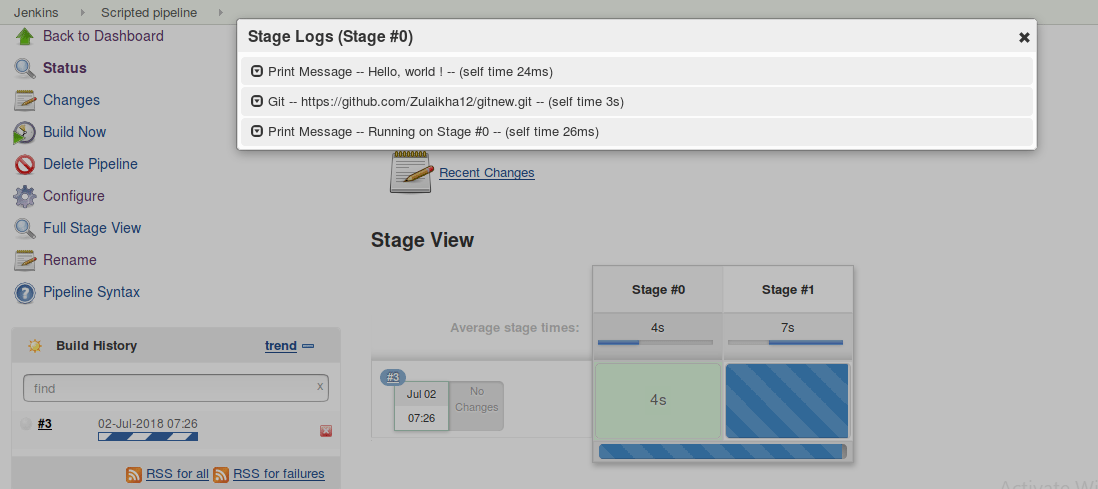
Next, I’m defining a simple ‘if else’ statement. If the value of ‘i’ equals to zero, then stage #0 will execute the following commands (git and echo). A ‘git’ command is used to clone the specified git directory and the echo command simply displays the specified message
The else statement is executed when ‘i’ is not equal to zero. Therefore, stage #1 will run the commands within the else block. The ‘build’ command simply runs the job specified, in this case it runs the ‘Declarative pipeline’ that we created earlier in the demo. Once it completes the execution of the job, it runs the echo command
Now that I’ve explained the code, lets run the pipeline. The following screenshot is the result of the Scripted pipeline.
Shows the results of Stage #0
2. Shows the logs of Stage #1 and starts building the ‘Declarative pipeline’
Implementing Elastic Search with Kibana and Logstash ElasticSearch is a search engine based on the Lucene library. It provides a distributed,multitenant-capable full-text search engine with a HTTP web interface and schema-free JSON documents.It is used in advanced search mechanism. Kibana is an open source analytics and visualisation platform designed to work with Elasticsearch. You use Kibana to search, view, and interact with data stored in Elasticsearch indices. LogStash is an open source, server-side data processing pipeline that ingests data from a multitude of sources simultaneously, transforms it, and then sends it to your favourite “stash” (like Elasticsearch). Before We start with loading the data from MYSQL to elasticSearch, Dowanload ElasticSearch, Kibana and Logstash of same versions(recommended 6.2.4) from the web browser. As El...

 Step 2) The initial Administrator password should be found under the Jenkins installation path (set at Step 4 in Jenkins Installation).
For default installation location to C:\Program Files (x86)\Jenkins, a file called initialAdminPassword can be found under C:\Program Files (x86)\Jenkins\secrets.
However, If a custom path for Jenkins installation was selected, then you should check that location for initialAdminPassword file.
Step 2) The initial Administrator password should be found under the Jenkins installation path (set at Step 4 in Jenkins Installation).
For default installation location to C:\Program Files (x86)\Jenkins, a file called initialAdminPassword can be found under C:\Program Files (x86)\Jenkins\secrets.
However, If a custom path for Jenkins installation was selected, then you should check that location for initialAdminPassword file.
 Step 3) Open the highlighted file and copy the content of the initialAdminPassword file.
 Step 4) Paste the password it into browser's pop-up tab (http://localhost:8080/login?form=%2F) and click on Continue button.
 Jenkins will start to download and install all the necessary plugins needed to create new Jenkins Jobs.
 Note: You can choose the Option "Select Plugins to Install" and select the plugins you want to install
 Step 2) After all suggested plugins were installed, the "Create First Admin User" panel will show up. Fill all the fields with desired account details and hit the "Save and Finish" button.

 Congratulations! We have successfully installed a new Jenkins Server. Hit the "Start using Jenkins" button.
 Below you can find the Jenkins instance up and run, ready to create first Jenkins job:

 Step 2: Click on Manage Plugins:
 Step 3: In the Plugins Page
 Step 4: Once the plugins have been installed, go to Manage Jenkins on your Jenkins dashboard. You will see your plugins listed among the rest.
 Step 2) Enter the item name, select job type and click OK. We shall create a Freestyle project as an example.
 Step 4) You will see a Git option under Source Code Management if your Git plugin has been installed in Jenkins:
 NOTE: If the Git option does not appear, try re-installing the plugins, followed by a restart and a re-login into your Jenkins dashboard. You will now be able to see the Git option as mentioned above.
Step 5) Enter the Git repository URL to pull the code from GitHub.
NOTE: If the Git option does not appear, try re-installing the plugins, followed by a restart and a re-login into your Jenkins dashboard. You will now be able to see the Git option as mentioned above.
Step 5) Enter the Git repository URL to pull the code from GitHub.
 Step 6) You might get an error message the first time you enter the repository URL. For example:
 This happens if you do not have Git installed in your local machine. To install Git in your local machine, go to https://git-scm.com/downloads
 Download the appropriate Git file for your Operating System, in this case, Windows, and install it onto your local machine running Jenkins. Complete the onscreen instructions to install GIT.
 Step 6) You can execute Git repositories in your Jenkins once Git has been installed on your machine. To check if it has been successfully installed onto your system, open your command prompt, type "Git" and press enter. You should see different options come up for Git:
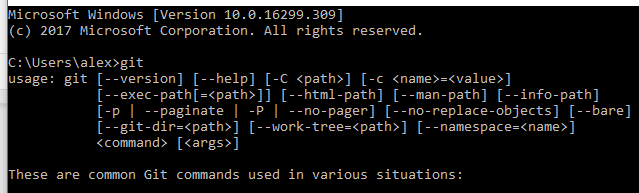 This means that Git has been installed in your system.
Step 7) Once you have everything in place, try adding the Git URL into Jenkins. You will not see any error messages:
This means that Git has been installed in your system.
Step 7) Once you have everything in place, try adding the Git URL into Jenkins. You will not see any error messages:


 6.Click ‘Build Now’.
7.On the ‘Build Executor Status’, click the progress bar. You will notice Jenkins install Maven.
8.Check your project.The output should look something as shown below.
6.Click ‘Build Now’.
7.On the ‘Build Executor Status’, click the progress bar. You will notice Jenkins install Maven.
8.Check your project.The output should look something as shown below.


 This approach is effective for deploying small applications. But what happens when there are complex pipelines with several processes (build, test, unit test, integration test, pre-deploy, deploy, monitor) running 100’s of jobs?
The maintenance cost for such a complex pipeline is huge and increases with the number of processes. It also becomes tedious to build and manage such a vast number of jobs. To overcome this issue, a new feature called Jenkins Pipeline Project was introduced.
The key feature of this pipeline is to define the entire deployment flow through code. What does this mean? It means that all the standard jobs defined by Jenkins are manually written as one whole script and they can be stored in a version control system. It basically follows the ‘pipeline as code’ discipline. Instead of building several jobs for each phase, you can now code the entire workflow and put it in a Jenkinsfile. Below is a list of reasons why you should use the Jenkins Pipeline.
This approach is effective for deploying small applications. But what happens when there are complex pipelines with several processes (build, test, unit test, integration test, pre-deploy, deploy, monitor) running 100’s of jobs?
The maintenance cost for such a complex pipeline is huge and increases with the number of processes. It also becomes tedious to build and manage such a vast number of jobs. To overcome this issue, a new feature called Jenkins Pipeline Project was introduced.
The key feature of this pipeline is to define the entire deployment flow through code. What does this mean? It means that all the standard jobs defined by Jenkins are manually written as one whole script and they can be stored in a version control system. It basically follows the ‘pipeline as code’ discipline. Instead of building several jobs for each phase, you can now code the entire workflow and put it in a Jenkinsfile. Below is a list of reasons why you should use the Jenkins Pipeline.


 Step 2: Next, enter a name for your pipeline and select ‘pipeline’ project. Click on ‘OK’ to proceed.

 Step 4: If you want a scripted pipeline then choose ‘pipeline script’ and start typing your code.
 Step 5: If you want a declarative pipeline then select ‘pipeline script from SCM’ and choose your SCM. In my case I’m going to use Git throughout this demo. Enter your repository URL.
 Step 6: Within the script path is the name of the Jenkinsfile that is going to be accessed from your SCM to run. Finally click on ‘apply’ and ‘save’. You have successfully created your first Jenkins pipeline.
Now that you know how to create a pipeline, lets get started with the demo.
Step 6: Within the script path is the name of the Jenkinsfile that is going to be accessed from your SCM to run. Finally click on ‘apply’ and ‘save’. You have successfully created your first Jenkins pipeline.
Now that you know how to create a pipeline, lets get started with the demo.


 Pipeline script – Jenkins Pipeline Tutorial


Comments
Post a Comment